Archive article: originally published in 2018. Models and specifications have changed since then; ask us in the shop about the current range.
If you want to know the steps to assemble a Canyon Endurace Disc when it arrives at your home in its protective box, here we show you.
In this article, and in the video on our YouTube channel , our Barcelona shop mechanic Agustín shows you how to assemble a carbon Canyon Endurace road bike with a Shimano groupset and disc brakes. Assembly is simple and you can do it at home, but you need to follow the steps in order, know what’s included in the cardboard box and read the manufacturer’s instructions. We show you the steps exactly as we assembled our road rental bikes for 2018 in our workshop, available at our shop in the centre of Barcelona. You can watch the video we’ve uploaded for a more visual explanation of the assembly. The only extra tool you’ll need is a box cutter to open the box; all the other tools you need come in the small cardboard box.
This small accessory box includes:
- A torque tool
- A bit set
- Carbon assembly paste
- The front wheel axle
- The Canyon instruction manual
- A Canyon gift bag
- A free Alpecin shampoo
- And an extra mesh bag containing a second torque tool for tightening the seatpost, spacers for the disc brake calipers and two sets of seatpost bolts

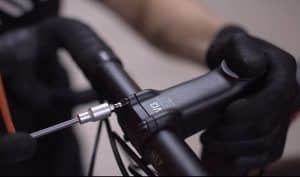
Remove the Velcro straps holding the front wheel and the other straps holding the seatpost and saddle to the bike. Insert one of the seatpost bolts by hand and, using the small sachet of paste, grease the seatpost and the frame tube to prevent future creaks, then insert the seatpost. With the extra torque wrench, tighten the bolt you fitted by hand to 5 Nm, following the mark on the wrench’s plastic indicator, and cover the bolt with the black rubber cap. To fit the handlebar, use the same paste on all the contact points between the stem and the handlebar. Once greased, fit the stem faceplate and the bolts by hand. Using the white markers on the stem and handlebar, set the handlebar angle and tighten the bolts with the main wrench to 5 Nm, following the orange plastic indicator on the wrench.