Archive article: originally published in 2018. Models and specifications have changed since then; ask us in the shop about the current range.
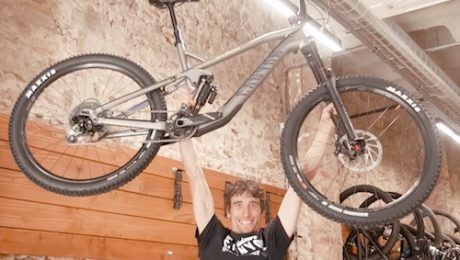
If you want to know the steps to assemble a Canyon Strive when it arrives at your home in its protective box, here we show you. In this article, and in the video on our YouTube channel, our mountain guide Manel shows you how to assemble an enduro bike like the one he’ll ride this season, the Canyon Strive 5.0. Assembly has its tricks, and although everything is explained in the documentation that comes with the bike, we show you step by step how to do it and also review the bike. We follow the steps exactly as Manel did; he’ll be riding this bike on the mountain bike tours he guides in 2018 around Barcelona and even in the French Alps. You can watch the video we’ve uploaded for a more visual explanation of the assembly. The only extra tool you’ll need is a box cutter to open the box; all the other tools come in the small cardboard box: a torque wrench with a bit set, a shock pump to set the suspension pressure and an adapter to inflate the Shapeshifter system. The bike arrives perfectly protected inside the box. Take the bike, wheels and all the protective packaging out of the box so you have all the parts to hand. Screw the rear derailleur onto the hanger, fit the rear wheel and tighten the axle, then fit the front wheel and tighten its axle. To fit the handlebar, first remove the stem cap, put a little grease on all the contact surfaces and tighten the bolts and handlebar position. Next, fit the dropper seatpost, which has its own special trick: first fit the metal part, then the housing stop, and it’s done. Add a little grease and set it to your height. Then set up the suspension, starting with the rear shock. Get on the bike and, with just your body weight, the sag should be between 20 and 30%. If you need to add or release pressure, use the shock pump with gauge that Canyon includes. Then move on to the fork and check the feel of the suspension. RockShox forks always have a weight/pressure chart on the back to inflate or deflate to the pressure that matches your weight. Check the chart on the back to know what pressure to use. With the fork also set to your weight, all that’s left is to check the Shapeshifter pressure (between 12 and 15 bar); if you need to change it, use the same pump with the supplied adapter. With this system the bike goes from a good climber to a perfect descender. The Strive AL 5.0 is designed to give stability even on the trickiest descents. This model comes with a SRAM 1×11 groupset with a 34T chainring and a 10-42 cassette. It’s fitted with a short stem and a 780 mm wide Race Face handlebar for fast, effective riding. The RockShox Monarch shock and RockShox Yari fork give maximum control with 170 mm of travel. It comes with tubeless-ready DT Swiss rims and Maxxis tyres. All that’s left is to add sealant and inflate the tyres to your optimal pressure. And the bike is ready to enjoy both the climbs and the most technical descents. See you in Barcelona.